This post is part of our HOW TO START tutorial series on Stable Diffusion. In this post we will have a look at some of the existing local installers out there. Local installers are a good option for advanced users who would like to have full control over what is running on their machines. Also local installers are open source, thus allowing expert users to tweak the code and optimise their results. Another benefit is the possibility to deploy the code on a virtual machine running in the cloud or use a pre-defined docker container containing all necessary dependencies.
In this tutorial we are going to have a look at the most prominent forks of Stable Diffusion. All forks listed here add additional features and optimisations and are generally faster than the original release.
Before you start – General requirements
Even though running Stable Diffusion in your own computer using optimised versions may improve the performance, it still requires some specific hardware configuration. In general Stable Diffusion requires following configuration:
- Windows 10/11 64-bit (for Windows Clients), Linux, Mac M1/M2
- Recent Nvidia GPU, preferably RTX
- 16 GB RAM
- 3 GB VRAM (for slow low-memory mode) or 6+ GB VRAM (for fast mode with more features)
- ~11 GB disk space after installation (on SSD for best performance)
If your computer doesn’t match the listed requirements, please have a look at other alternatives like Web Clients or Google Colab Notebooks.
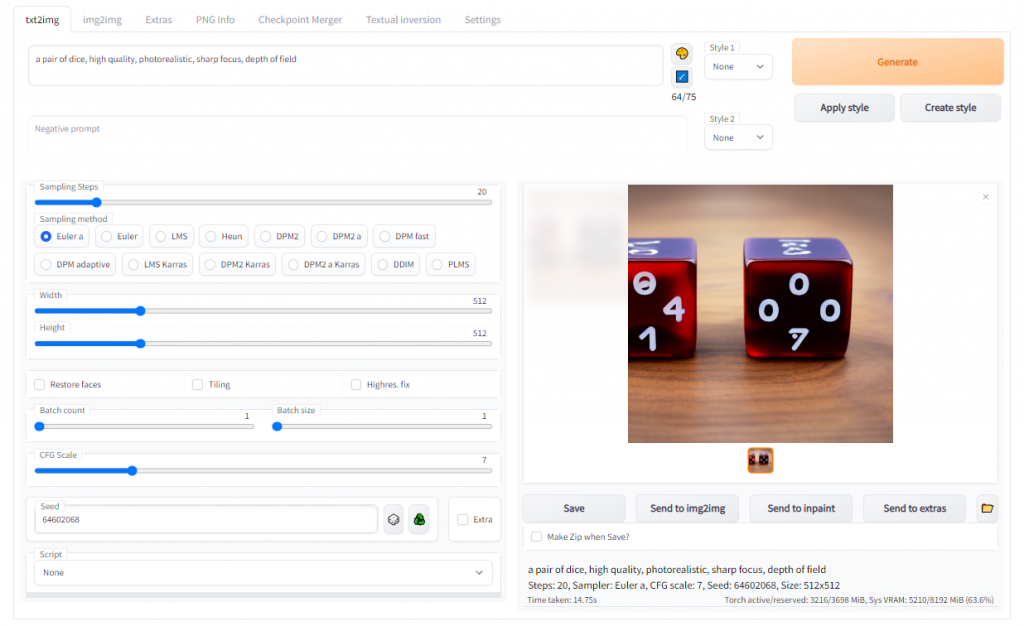
AUTOMATIC1111 – Stable Diffusion Web UI
The Stable Diffusion Web UI from AUTOMATIC1111 is probably the fork with the most built-in features for Stable Diffusion. Due to its active development and community support it also supports many out-of-the-box addons like upscaling, face restoring, CLIP interrogator and model training. After installing the dependencies it will start a friendly browser interface that can be accessed in your local machine.It runs on Windows and Linux machines.
Dependencies:
- Windows or Linux
- Python 3.10.6
- Git
- Code
- Stable Diffusion Model
Installing dependencies
- Install Python 3.10.6 (make sure to “Add Python to PATH” when installing on Windows)
- Windows: download and run installers for Python 3.10.6 (webpage, exe, or win7 version)
- Linux (Debian-based):
sudo apt install wget git python3 python3-venv - Linux (Red Hat-based):
sudo dnf install wget git python3 - Linux (Arch-based):
sudo pacman -S wget git python3
- Install Git
- Download and Install Git from https://gitforwindows.org/
- If you are newbie: Accept all of the default settings it offers except for the default editor selection. Once it asks for what the default editor is, most people who are unfamiliar with this should just choose Notepad because everyone has Notepad on Windows.
- Install code on Windows
- Preferred way: using git:
git clone https://github.com/AUTOMATIC1111/stable-diffusion-webui.git. This way is referred because it lets you update (get the latest features) by just runninggit pull.- Those commands can be used from command line window that opens after you right click in Explorer and select “Git Bash here”.
- Alternative way: use the “Code” (green button) -> “Download ZIP” option on the main page of the repo. You still need to install git even if you choose this.
- To update, you’ll have to download zip again and replace files.
- Preferred way: using git:
- Install code on Linux
- To install in
/home/$(whoami)/stable-diffusion-webui/, run: bash <(wget -qO- https://raw.githubusercontent.com/AUTOMATIC1111/stable-diffusion-webui/master/webui.sh)
- To install in
- Download Stable Diffusion Model
- The Stable Diffusion model checkpoint, a file with
.ckptextension, needs to be downloaded renamed to “model.ckpt” and placed in themodels/Stable-diffusiondirectory.- Official way:
Create a Hugging Face account:https://huggingface.co
After you have signed up and signed in go to this link and click on Access Repository:https://huggingface.co/CompVis/stable-diffusion-v-1-4-original
After you have authorised your account, go to this link to download the model weights:https://huggingface.co/CompVis/stable-diffusion-v-1-4-original/resolve/main/sd-v1-4.ckpt
Placed it in themodels/Stable-diffusiondirectory - Alternative way: Download it from a drive
– Option 1
– Option 2
- Official way:
- The Stable Diffusion model checkpoint, a file with
Running it
Run webui-user.bat from your File Explorer or webui-user.sh from Linux. Run it as normal user, not as administrator.
Wait patiently while it installs dependencies and does a first time run. It may seem “stuck” but it isn’t. It may take up to 10-15 minutes. And here you go! 🔥
Fork: https://github.com/AUTOMATIC1111/stable-diffusion-webui
Features: https://github.com/AUTOMATIC1111/stable-diffusion-webui/wiki/Features
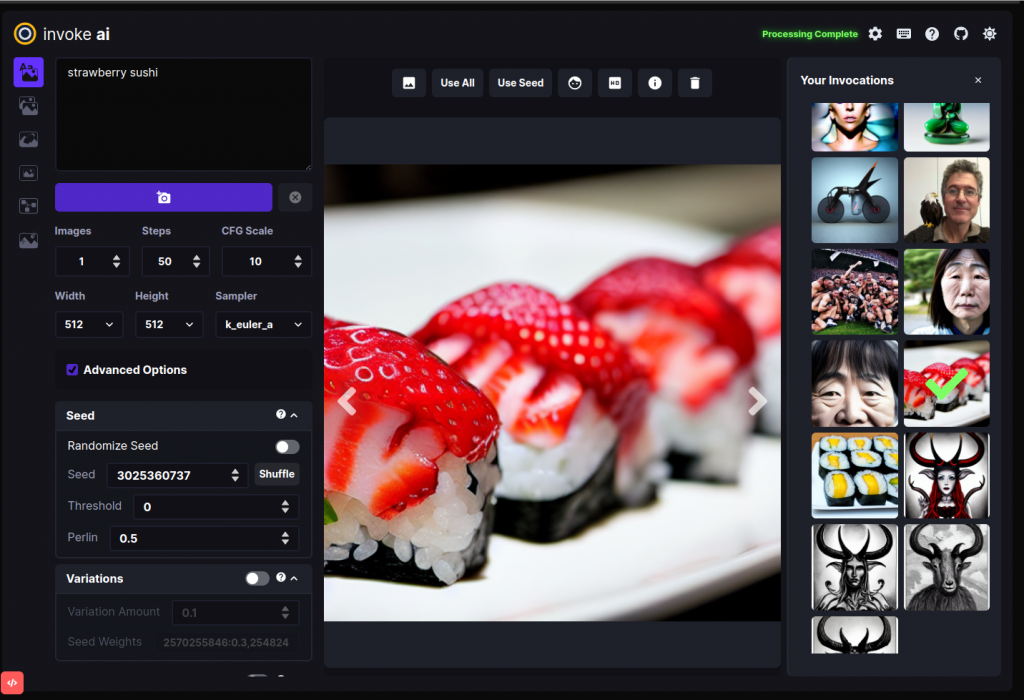
InvokeAI (runs on Mac M1/M2)
InvokeAI provides a streamlined process with various new features and options to aid the image generation process. It runs on Windows, Mac and Linux machines, with GPU cards with as little as 4 GB of RAM. It provides both a polished Web interface, and an easy-to-use command-line interface.
Installation and usage
This fork is supported across multiple platforms. You can find individual installation instructions below.
Fork: https://github.com/invoke-ai/InvokeAI
Features: https://github.com/invoke-ai/InvokeAI#features
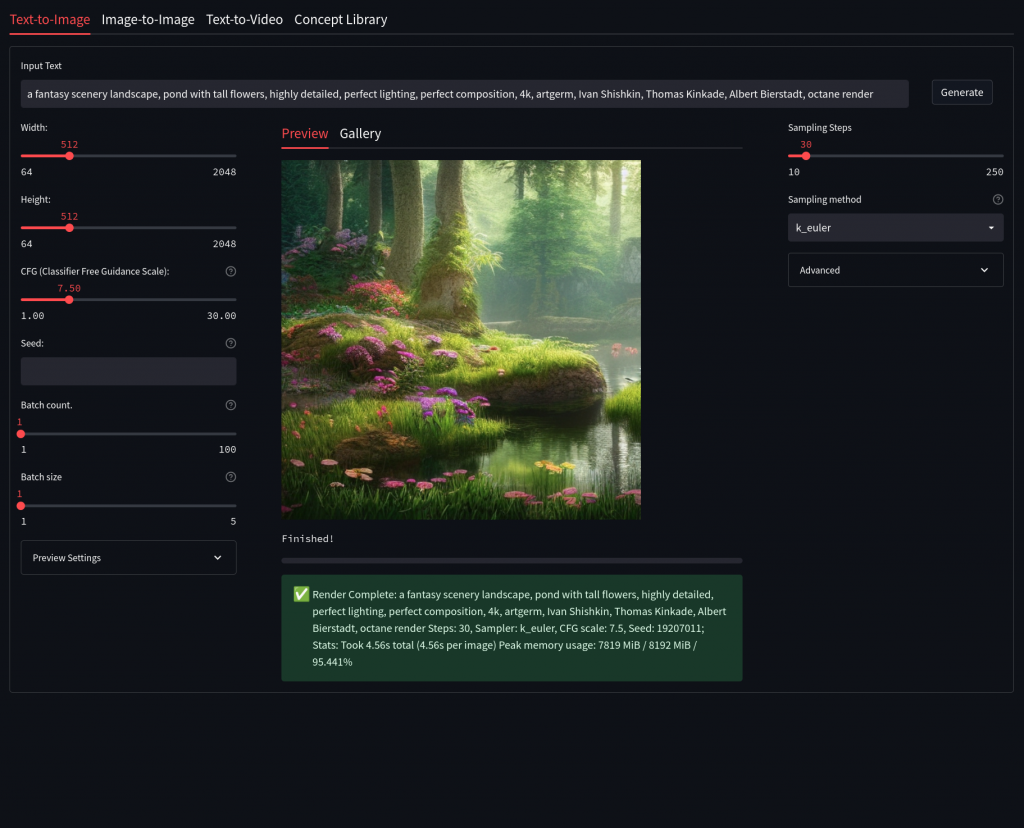
sd-webui – Stable Diffusion Web UI
The Stable Diffusion Web UI from sd-webui is another the fork with a lot of built-in features for Stable Diffusion. After installing the dependencies it will start a friendly browser interface that can be accessed in your local machine. It runs on Windows and Linux machines.
Installation and usage
This fork is supported across multiple platforms. You can find individual installation instructions below.
Fork: https://github.com/sd-webui/stable-diffusion-webui
Features: https://sd-webui.github.io/stable-diffusion-webui/docs/4.streamlit-interface.html
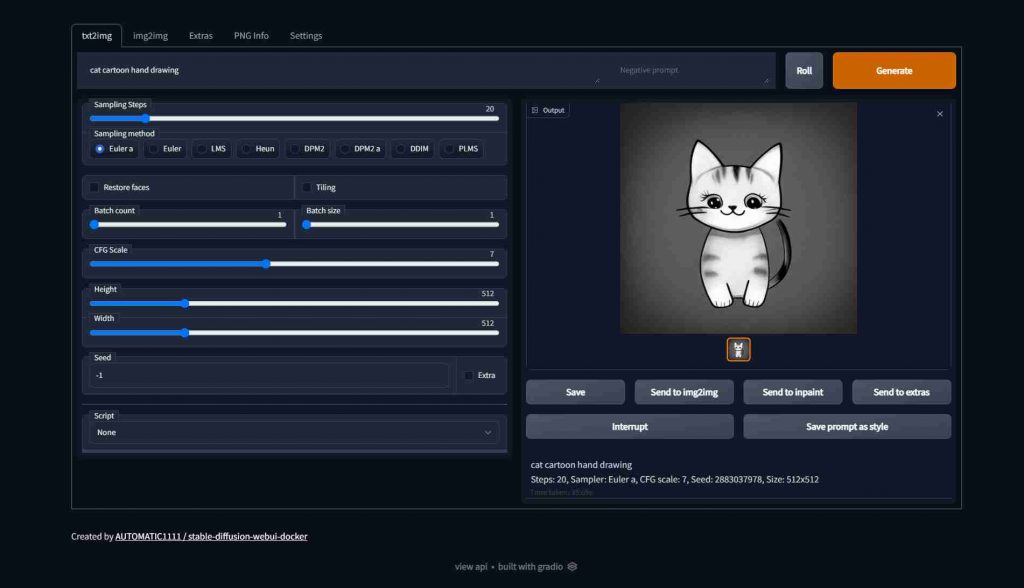
Docker – Stable Diffusion WebUI
This repository provides multiple UIs (AUTOMATIC1111, sd-webui) for you to play around with stable diffusion. I allows you to run Stable Diffusion on your machine with a nice UI without the need of installing dependencies. The only thing that you need is Docker. It runs on Windows and Linux machines.

Installation
- Download and install Docker Desktop from here: https://docs.docker.com/engine/install/
- Download repository
- Preferred way: using git:
git clone https://github.com/AbdBarho/stable-diffusion-webui-docker.git. This way is referred because it lets you update (get the latest features) by just runninggit pull.- Those commands can be used from command line window that opens after you right click in Explorer and select “Git Bash here”.
- Alternative way: use the “Code” (green button) -> “Download ZIP” option on the main page of the repo. You still need to install git even if you choose this.
- To update, you’ll have to download zip again and replace files.
- Preferred way: using git:
Usage
Run docker compose --profile download up --build
This will download all of the required models / files, and validate their integrity. You only have to download the data once (regardless of the UI). There are roughly 8GB of data to be downloaded.
Next, choose which UI you want to run (you can easily change later):
hlky: The most popular fork, Repo by sd-webuiauto: Another great fork, many features with neat UI, Repo by AUTOMATIC1111auto-cpu: for users without a GPU.
After the download is done, you can run the UI using:
docker compose --profile [ui] up --build
Will start the app on http://localhost:7860/. Feel free to try out the different UIs.
Note: the first start will take some time since other models will be downloaded, these will be cached in the data folder, so next runs are faster. First time setup might take between 15 minutes and 1 hour depending on your internet connection, other times are much faster, roughly 20 seconds.