

This post is part of our HOW TO START tutorial series on Stable Diffusion.
In this tutorial we will guide you through the basic settings as well as through the most important parameters you can use in Stable Diffusion. I really recommend you to try the parameters along with this tutorial to understand how they actually work. Let’s go! 😎👊
Prompt basics
Let’s first understand the structure of a prompt.
(subject)(style), (action/scene), (artist), (filters)
Following this basic rule you will be able to generate some descent images.
(subject)
This is the basic building block of any prompt. The so called raw prompt. Ex: a black horse.
(style)
Style is a crucial part of the prompt. The AI, when missing a specified style, usually chooses the one it has seen the most in related images, for example, if I generated landscape, it would probably generate realistic or oil painting looking images. Having a well chosen style + raw prompt is sometimes enough, as the style influences the image the most right after the raw prompt.
(action/scene)
The action describes what the subject is actually doing and the scene describes where.
Example: jumping in the forest
(filters)
Filters are the extra sauce that you add to your prompt to make it look like you want. For instance, if you want to make your image more artistic, add “trending on artstation”. If you want to add more realistic lighting add “Unreal Engine.” You can be creative and add any filter that you want, but here are some examples:
Highly detailed, surrealism, trending on art station, triadic color scheme, smooth, sharp focus, matte, elegant, the most beautiful image ever seen, illustration, digital paint, dark, gloomy, octane render, 8k, 4k, washed colours, sharp, dramatic lighting, beautiful, post processing, picture of the day, ambient lighting, epic composition
Here is the final example using this basic rule:
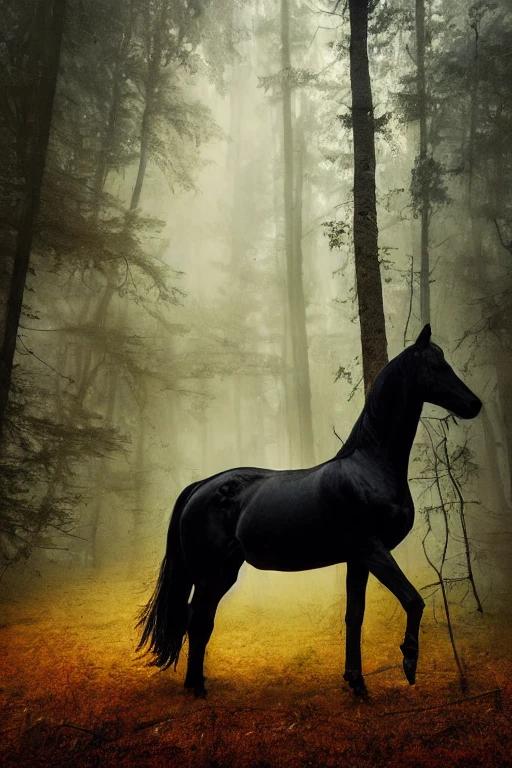
realistic art of a black horse, in the forest, by marc simonetti, fog, centered, symmetry, painted, intricate, volumetric lighting, beautiful, rich deep colours, masterpiece, sharp focus, ultra detailed, 4k
Seed
A seed is a specific region in the latent space of the Stable Diffusion Modell. You can think of it as coordinates.
Stable Diffusion takes two primary inputs and translates these into a fixed point in its model’s latent space:
- A seed integer
- A text prompt
The same seed and the same prompt given to the same version of Stable Diffusion will output the same image every time. In other words, the following relationship is fixed:
seed + prompt = image
If your experiments with Stable Diffusion have resulted in you getting different images for the same prompt (and they probably have), it’s because you were using a random seed integer every time you submitted the prompt:
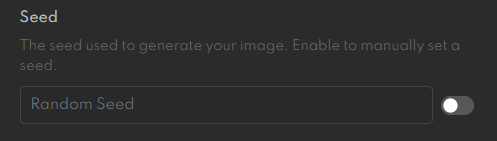
If you generate an image that you like you can specify the seed of it and tweak the prompt to have consistent variations of your original image. If you do not change the prompt you will get exactly the same results because of the fixed relationship of prompt and seed.
Width & Height
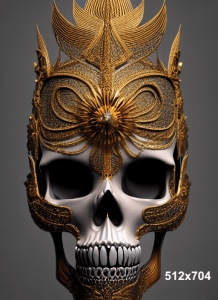
This settings will define the aspect ratio of your images. You can experiment with the width/height as much as you want but remember. Stable Diffusion is optimised for 512×512 width & height. If you change this settings the generation time and the memory consumption can highly increase.
Pro tip:
Do not generate images with high resolution. Instead increase the number of steps (will be explained soon) and use upscalers to upscale your images.
Just keep in mind that changing this will change your composition, and costs extra credits.
Here some examples of aspect ratios:


CFG Scale
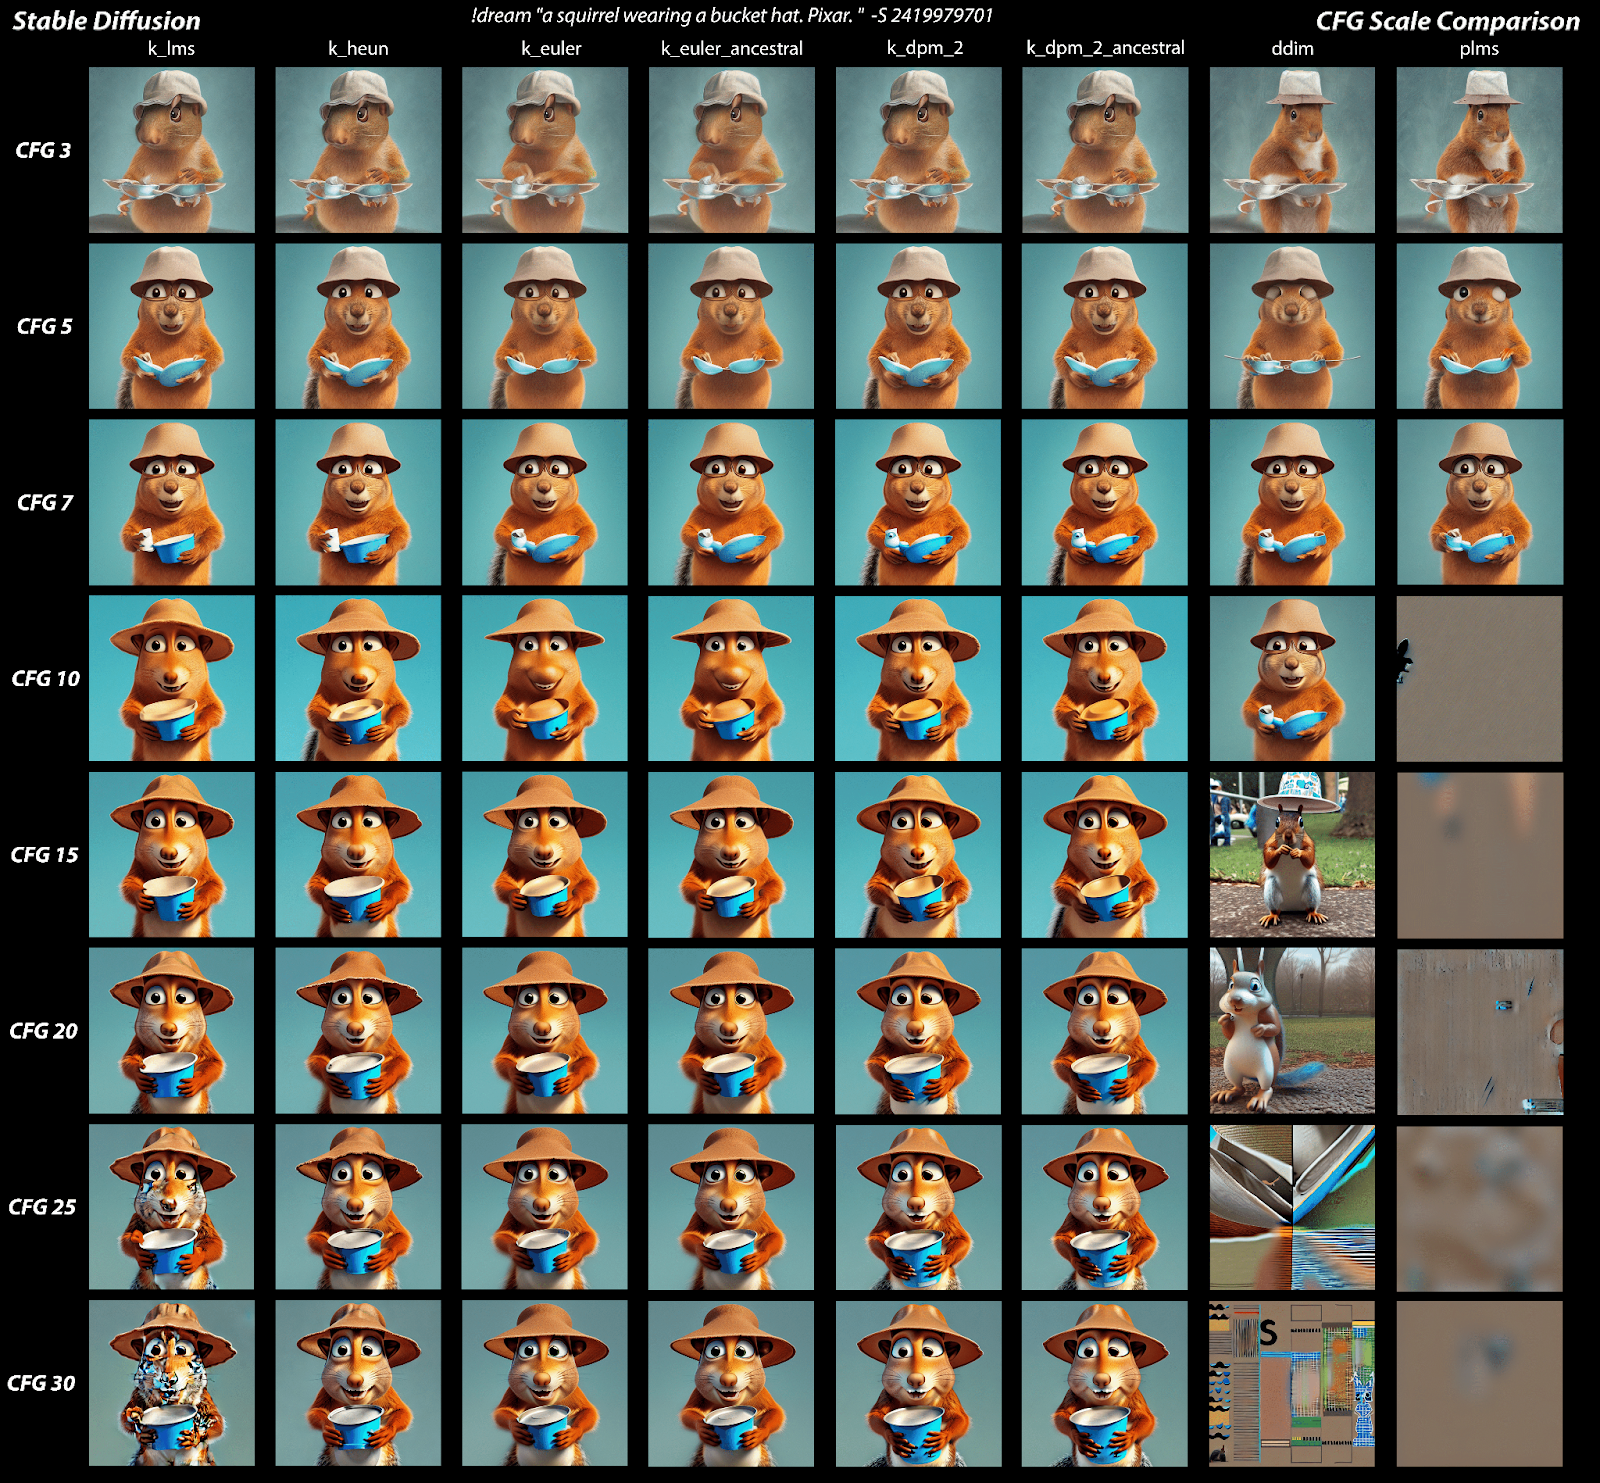
This term stands for Classifier Free Guidance Scale and is a measure of how close you want the model to stick to your prompt when looking for a related image to show you. A Cfg Scale value of 0 will give you essentially a random image based on the seed, where as a Cfg Scale of 20 (the maximum on SD) will give you the closest match to your prompt that the model can produce. In the comparison below you can see that increasing the CFG scale more than 15 will not produce better results for most of the samplers and that will start adding artefacts to some of them. The sweet spot is between 7 and 13.
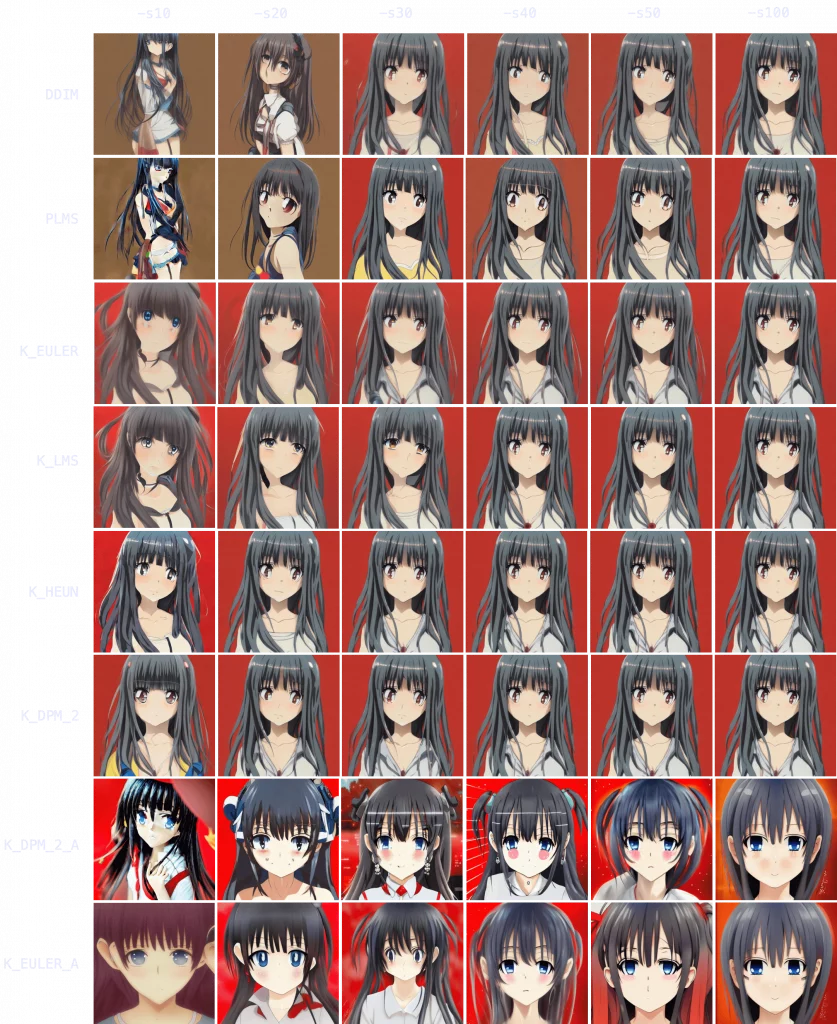
Steps
Increasing the amount of steps tells Stable Diffusion that it should take more steps to generate your final result which can increase the amount of detail in your image. Higher steps does not always equal a better result. Especially when using a huge amount, like 100-150 or even higher. Just like the CFG scale, this does depend on your prompt, but going too high with the steps can cause artefacts in your final result.
It might seem logical to always run at the maximum amount of steps, but this isn’t always a good idea. Often you don’t see that much of a difference when running your steps higher than 70-100, depending on your prompts. And in most cases, for simpel images, 50 is plenty ok for most of the samplers, as you can see in the comparison bellow:
Samplers
Sampling method are kind of technical, so I won’t go into what these are actually doing under the hood. Basically sampler is what Stable Diffusion uses to decide how to generate your final result. You can change this setting and try it by yourself, but the differences between samplers are often very small. But again, it depends a bit on your prompt. Please feel free to experiment.
Here are the most used samplers and some of their characteristics:
k_lms – Default in the most of the cases
k_lms at 50 steps will give you fine generations most of the time if your prompt is good. k_lms runs pretty quick, so the results will come in at a good speed as well. You could easily just stick with this setting forever at CFG 7-8 and be ok. If things are coming out looking a little cursed, you could try a higher step value, like 80. But, as a rule of thumb, make sure your higher step value is actually getting you a benefit, and you’re not just wasting your time. You can check this by holding your seed and other settings steady and varying your step count up and down. You might be shocked at what a low step count can do. I’m very skeptical of people who say their every generation is 150 steps.
DDIM – Fast for simple images
DDIM at 8 steps (yes, you read that right. 8 steps) can get you great results at a blazing fast speed. This is a wonderful setting for generating a lot of images quickly. When I’m testing new prompt ideas, I’ll set DDIM to 8 steps and generate a batch of 4-9 images. This gives you a fantastic birds eye view of how your prompt does across multiple seeds. This is a terrific setting for rapid prompt modification. You can add one word to your prompt at DDIM:8 and see how it affects your output across seeds in less than 5 seconds (graphics card depending). For more complex prompts, DDIM might need more help. Feel free to go up to 15, 25, or even 35 if your output is still coming out looking garbled (or is the prompt the issue??). You’ll eventually develop an eye for when increasing step count will help. Same rule as above applies, though. Don’t waste your own time. Every once in a while make sure you need all those steps.
k_euler_a – The creative
Everything that applies to DDIM applies here as well. This sampler is also lightning fast and also gets great results at extremely low step counts (steps 8-16). But it also changes generation style a lot more. Your generation at step count 15 might look very different than step count 16. And then they might BOTH look very different than step count 30. And then THAT might be very different than step count 65. This sampler is wild. It’s also worth noting here in general: your results will look TOTALLY different depending on what sampler you use. So don’t be afraid to experiment. If you have a result you already like a lot in k_euler_a, pop it into DDIM (or vice versa).
k_dpm_2_a – Slow but solid
In my opinion, this sampler might be the best one, but it has serious tradeoffs. It is VERY slow compared to the ones I went over above. However, for my money, k_dpm_2_a in the 30-80 step range is very very good. It’s a bad sampler for experimentation, but if you already have a prompt you love dialed in, let it rip. Just be prepared to wait. And wait. If you’re still at the stage where you’re adding and removing terms from a prompt, though, you should stick to k_euler_a or DDIM at a lower step count.
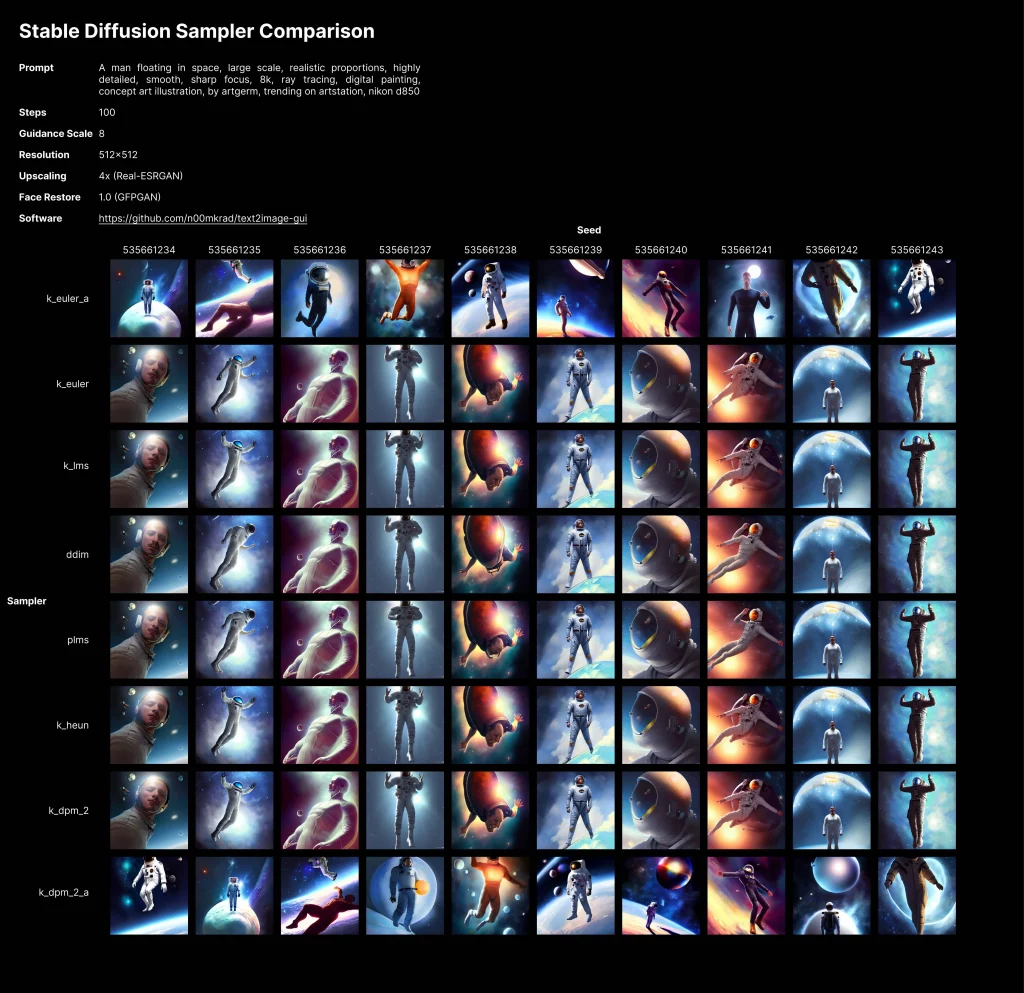
Sampler study
In the image below you can see a Stable Diffusion sampler comparison:
What’s next?
Have a look at our prompt building section to gain some experience and get inspired by the community.


Some typos (descent : decent, simpel : simple) but otherwise a helpful article. Thx
Clear, thank you. I am loving this world… as an artist.
[…] sourceThe article is sourced from the internet. Click the “Source” button to view the original content. If there is any copyright infringement, please contact our team for removal. […]